Saturday, December 10, 2011
 0
comments
0
comments

Thursday, December 8, 2011
Using the Amazon Appstore from outside the US (including paid apps)
I saw this article and thinking of using it once I am free.
Source: HERE.
The Amazon Appstore launched recently and it's very cool, but unfortunately it's limited to US customers, leaving the rest of us out in the cold. Which sucks. BUT, there are ways around it! Successfully using the Appstore relies on you having a US presence - a US credit card, a US address and a US phone number (handily, not a US IP), but there are ways to meet this criteria.
Here's how i'm happily using the Amazon Appstore on by device from the UK.
I've listed two options for each step of the process below. First is what I would call the 'recommended' way of doing things and the second is a slightly more dubious alternative approach (albeit perhaps easier). I'm using the recommended way, but I've been told the other way works.
Enjoy - please post below if the process works for you.

P
PS Follow @aafaotd on Twitter to find out the latest free apps of the day (with rating and previous price).
Step 1 - Creating your Amazon account
To use the Appstore, first you need to create an Amazon.com account. This should be seperate from your main account, with a unique e-mail address. I use Gmail so I have a handy facility to provide a unique e-mail address built in to my e-mail account... by signing up with the address myname+appstore@gmail.com (everything after the + is ignored in Gmail routing but can be used for filtering etc.).
To sign up with Amazon.com,visit the Amazon.com sign in page and select 'No, I am a new customer'.
Step 2 - Setting up your billing address
Next you need to set up a US address (which will be the billing address you associate with the payment card on the account) - you do this on the Manage Address Book page. This MUST be a valid US address.
Recommended: I signed up for a 'USUnlocked' virtual payment card ($10) which provides you with a legitimate US billing address to enter in your account. I signed up for this on a weekend and had the details available to me the same day. Other virtual cards are available, let us know if you find a good one with a real US billing address!
Alternative: You don't actually plan to get anything shipped to this address, so you COULD enter any valid US address here, e.g. '1600 Amphitheatre Parkway Mountain View, CA 94043' (which happens to be the home of Google).
Step 3 - Setting up your phone number
While setting up your address in the step above, you will be prompted for a phone number. This MUST be a US phone number.
Recommended: The easiest way to get a valid US address is via a SIP account (I use sipgate.com, which I signed up to using a free US VPN service. Hotspot Shield is one such service.) There are however many SIP providers who provide US inbound numbers (including Google Voice, which you should also be able to configure with a US VPN connection), so this part is pretty straightforward.
Alternative: You don't actually plan on receiving any calls to this number, so you COULD just enter any number starting with +1. Easier than that, you can just enter +1!
Step 4 - Setting up your payment card
Next you need to set up a US payment card - you do this on the Manage Payment Options page. This MUST be a valid US card (my UK Amex for example wasn't accepted).
Recommended: As mentioned above, I signed up for a 'USUnlocked' virtual payment card ($10) which provides you with a Discover card number to enter in your account.
Alternative: You don't actually plan to buy anything with this card, so you COULD use a test card number from one of the card companies, such as those listed by PayPal.
Step 5 - Install the AppStore on your device
Now that you've set up your Amazon account, you need to install the Appstore on your device. Point your web browser at http://go.modaco.com/aadownload and the APK will be downloaded directly to your device.
Once the app is installed, run it and sign in with your new Amazon.com account and you're all set!
Step 6 (optional) - Purchasing paid apps from the Amazon Appstore
If you've set up the account with a valid US payment card then paid apps will just work. If the card you have registered is either empty of funds or a 'test card', payments will fail. BUT, helpfully, retrying payments can be carried out with any card, from any country! So, to buy an app...
Source: HERE.
The Amazon Appstore launched recently and it's very cool, but unfortunately it's limited to US customers, leaving the rest of us out in the cold. Which sucks. BUT, there are ways around it! Successfully using the Appstore relies on you having a US presence - a US credit card, a US address and a US phone number (handily, not a US IP), but there are ways to meet this criteria.
Here's how i'm happily using the Amazon Appstore on by device from the UK.
I've listed two options for each step of the process below. First is what I would call the 'recommended' way of doing things and the second is a slightly more dubious alternative approach (albeit perhaps easier). I'm using the recommended way, but I've been told the other way works.
Enjoy - please post below if the process works for you.
P
PS Follow @aafaotd on Twitter to find out the latest free apps of the day (with rating and previous price).
Step 1 - Creating your Amazon account
To use the Appstore, first you need to create an Amazon.com account. This should be seperate from your main account, with a unique e-mail address. I use Gmail so I have a handy facility to provide a unique e-mail address built in to my e-mail account... by signing up with the address myname+appstore@gmail.com (everything after the + is ignored in Gmail routing but can be used for filtering etc.).
To sign up with Amazon.com,visit the Amazon.com sign in page and select 'No, I am a new customer'.
Step 2 - Setting up your billing address
Next you need to set up a US address (which will be the billing address you associate with the payment card on the account) - you do this on the Manage Address Book page. This MUST be a valid US address.
Recommended: I signed up for a 'USUnlocked' virtual payment card ($10) which provides you with a legitimate US billing address to enter in your account. I signed up for this on a weekend and had the details available to me the same day. Other virtual cards are available, let us know if you find a good one with a real US billing address!
Alternative: You don't actually plan to get anything shipped to this address, so you COULD enter any valid US address here, e.g. '1600 Amphitheatre Parkway Mountain View, CA 94043' (which happens to be the home of Google).
Step 3 - Setting up your phone number
While setting up your address in the step above, you will be prompted for a phone number. This MUST be a US phone number.
Recommended: The easiest way to get a valid US address is via a SIP account (I use sipgate.com, which I signed up to using a free US VPN service. Hotspot Shield is one such service.) There are however many SIP providers who provide US inbound numbers (including Google Voice, which you should also be able to configure with a US VPN connection), so this part is pretty straightforward.
Alternative: You don't actually plan on receiving any calls to this number, so you COULD just enter any number starting with +1. Easier than that, you can just enter +1!
Step 4 - Setting up your payment card
Next you need to set up a US payment card - you do this on the Manage Payment Options page. This MUST be a valid US card (my UK Amex for example wasn't accepted).
Recommended: As mentioned above, I signed up for a 'USUnlocked' virtual payment card ($10) which provides you with a Discover card number to enter in your account.
Alternative: You don't actually plan to buy anything with this card, so you COULD use a test card number from one of the card companies, such as those listed by PayPal.
Step 5 - Install the AppStore on your device
Now that you've set up your Amazon account, you need to install the Appstore on your device. Point your web browser at http://go.modaco.com/aadownload and the APK will be downloaded directly to your device.
Once the app is installed, run it and sign in with your new Amazon.com account and you're all set!
Step 6 (optional) - Purchasing paid apps from the Amazon Appstore
If you've set up the account with a valid US payment card then paid apps will just work. If the card you have registered is either empty of funds or a 'test card', payments will fail. BUT, helpfully, retrying payments can be carried out with any card, from any country! So, to buy an app...
- Purchase the app in the Appstore on the Amazon website or on your device - the initial payment will fail
- Visit the Digital Orders Page page and you will see your pending purchases
- Choose the option to retry the purchases, this time using your non-US card
- The payments will complete and you will be able to download the apps on your device

Celcom iPhone 4S online pre-order scheduled to begin midnight 9 Dec 2011.
Malaysian Wireless today reported - Celcom iPhone 4S online pre-order scheduled to begin midnight 9 Dec 2011.


Wednesday, December 7, 2011
Chrome OS: One Year Later
 I never really imagined this day coming. But it's here. It's one year after Gadgetator's first post ever. So much has happened since them, and a big thanks goes out to Leo Laporte, host of the nationally syndicated Tech Guy radio show, on which Gadgetator got it's big boost. But enough about my blog. Let's get right to what this post's really about.
One year ago, on this day, I posted an article talking about Google's announcement of the Cr48, one of the major advancements in Google's Chrome OS operating system. If you are unfamiliar with what Chrome OS is, read the article here. In that article, I promised I would post a follow up after playing a bit with Chrome OS. I never did. Until now.
A lot has happened with Chrome OS in the past year. For example, a Chrome OS screenshot one year ago (see figure 1), as apposed to a Chrome OS screenshot today (see figure 2). After actually using a device running solely Chrome OS for close to half-a-year, I have developed a new opinion, and I'm here to share that. I guess this article is an overview of Chrome OS: one year later.
 |
| Figure 1 |
 |
| Figure 2 |
Not wanting to just toss aside something I received for free, plus taking into account what Google actually intended for me to do with the device, I decided to give it a fair try. I never really went back.
I was already stuck in the Google Universe. I used Gmail, Google Docs, Google Reader, and many other online alternatives to native desktop apps. As soon as I switched to Chrome OS, I found it surprisingly easy to find great online alternatives to any desktop apps that I need. Because I have a "real" computer, I could even print directly from Chrome OS using Cloud Print. Of course, I gave up some conveniences, but I believe that was a fair price to pay for the simplicity I now gained. No complex files, programs messing up your system, virus issues, or any other junk that comes along with a Windows or Mac computer. I couldn't have used this as my only computer, I still use iTunes regularly, but it definitely works a great, simple replacement.
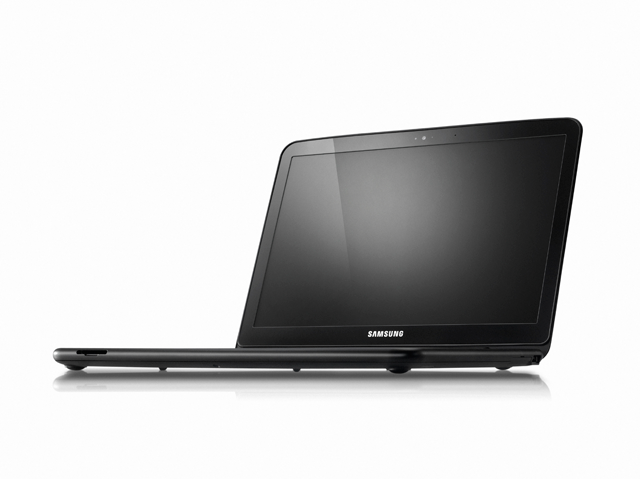 |
| The Samsung Chromebook |
Google now licences Chrome OS to manufacturers, who created their own 'Chromebooks'. Currently, both Samsung and Acer have a few models, which run from about $300-$450. At that price, it might be smarter to get a low-end Windows machine, but if you're willing to pay that price for simplicity's sake, it may be worth it. I think that, at this point, Chrome OS and the Chromebooks are great for either simple-computer users who don't want to be confused by the complexities of a "real" operating system, or to be used as a companion to a "real" computer, as Chrome OS has a clean interface, amazing boot time, and easy access to the web.
Have you played with Chrome OS or the Cr48? Did you take the plunge and buy a Chromebook? What are your experiences with Google's Chrome OS? Like it? Drop a comment below with your experiences.
[HOW-TO] - Install Android Market On BlackBerry PlayBook

Source from IntoMobile – a blog dedicated to covering the latest and greatest from the world of mobiles and mobile technology.
DISCLAIMER: We will not be held responsible if you lose data or your device gets damaged in the following of this guide. Proceed at your own risk.
These instructions come straight from the developers:
Step 1: Install PlayBook OS 2.0 Beta on your PlayBook [Official Website]
Step 2: Root your BlackBerry PlayBook with DingleBerry [Instructions].
Step 3: Download Google Apps [CyanogenMod Wiki].
Step 4: Package an Android app as a .bar file, install and launch it to set things up. Consider installing a launcher app since it will be required later on to actually launch Market. Get one from here [PlayBook BARS]
Step 5: Using WinSCP for Windows, log into your BlackBerry PlayBook as root. Copy the system folder from Google Apps in Step 3 to the root of your PlayBook’s storage and merge it with the PlayBook’s own system folder.
Step 6: Using a terminal with root access, enter the following commands:
mv /system/app/SetupWizard.apk /system/app/SetupWizard.apk.bak
Step 7: You must now kill the Android Player with:
cd /apps/sys.android.XXXX.ns/native/scripts
and then run ./android-player-cmd.sh kill-android-core.sh
The XXXX above is different for each device.
Step 8: Using a launcher from Step 4, launch Android Market and enter account details.
If you followed the steps correctly, Android Market will now be installed and working on your BlackBerry PlayBook.
Monday, December 5, 2011
[HOW-TO] - Install (Port) Siri On iPhone 4 And iPod Touch 4G

Guys, it’s finally here; H1Siri is the first service making Siri porting to the public free of charge.
You can install Siri on your iPhone 4 and iPod touch right now and get it fully ported and connected to Apple’s servers. Just follow our full step by step guide shown below.
This full port of Siri is made for iPhone 4 GSM & CDMA versions and iPod Touch 4G only.
Other devices are currently not supported.
If you have previously installed a jailbreak tweak known as “Siri0us” which installed Siri dictation on iOS 5 devices, it’s better to remove it to prevent crashing and conflicting.
The guys known as CD-Team developed a tweak called “H1Siri” which brings Siri’s GUI and Siri connectivity to the team’s own servers. Siri will not be connected to Apple’s servers, instead, it will be connected to private servers.
How To Fully Port Siri On iPhone 4 & iPod Touch 4G
STEP 1: First of, you’ll need an iPhone 4 or iPod touch running iOS 5 / iOS 5.0.1. You can check our iOS firmware download page here.
STEP 2: You’ll also need to jailbreak your iPhone 4 or iPod touch 4G by using our guide posted here for iOS 5.
STEP 3: Once jailbroken, head to Cydia then Manage, Sources, Edit and finally hit Add.
STEP 4: Write the following repository and hit add:
http://www.cydia.be
OR
http://www.iphone3gsystem.fr/cydia
STEP 5: Get back to Cydia and search for H1Siri and install it. It will take some time since it weighs 109 MB.
STEP 6: After successful installation, give your device a reboot.
STEP 7: Now go to Settings, General, Siri and switch it to on.
Another youtube link:
http://youtu.be/7AMZPF1_RcQ
DISCLAIMER: We are not to be held responsible for any loss of data as a result of the malfunctioning of your device in the following of this guide. Follow at your own risk.
Sunday, December 4, 2011
Confirmed - Maxis to Launch iPhone 4S on Dec. 16, 2011
Finally the wait is over for Malaysian iPhone fans!
Its gonna be Dec. 16, 2011 as what has been rumored in Low Yat Net Forum.
However, I have purchased this awesome gadget much earlier... ;-)

Subscribe to:
Posts (Atom)


